I recently configured GitLab as a OAuth2 client to a Nextcloud Instance. I wanted OAuth2 to be the only way of logging in, and Nextcloud to provide the information needed for one-click user signup (actually, three clicks). This process was not entirely straightforward, especially since I don’t want my buttons to read “OAuth2-Generic”. Changing the name after setting everything up, means changing URLs and in combination with Nextcloud this means recreating your tokens. Long story short: I wrote down how I did it.
Here’s the relevant documentation:
- Nextcloud 14 Admin Docs on OAuth2
- Where and how to get the user profile info from Nextcloud
- GitLab Docs on OAuth2 / Omniauth
- Omniauth-OAuth2-Generic Example
Base configuration in GitLab
If you’re planning on giving your Login-Method a clearer name than “OAuth2-Generic”, I’d propose starting here. Giving that Omniauth strategy a human readable name (like: “Nextcloud”) will also change the authentication URLs. So, here we go:
Parts of your gitlab.rb should look somewhat like this:
### OmniAuth Settings
###! Docs: https://docs.gitlab.com/ce/integration/omniauth.html
gitlab_rails['omniauth_enabled'] = true
gitlab_rails['omniauth_allow_single_sign_on'] = ['Nextcloud']
gitlab_rails['omniauth_block_auto_created_users'] = false
gitlab_rails['omniauth_providers'] = [
  {
    "name" => "oauth2_generic",
    "app_id" => "--- filled in LATER ---",
    "app_secret" => "--- filled in LATER ---",
    "args" => {
      "name": "Nextcloud", # display name for this strategy
      "strategy_class": "OmniAuth::Strategies::OAuth2Generic",
      "access_type" => "offline",
      "approval_prompt" => "",
      "client_options": {
        "site": "https://nextcloud.example.com",
        "authorize_url": '/apps/oauth2/authorize',
        "token_url": '/apps/oauth2/api/v1/token',
        "user_info_url": "/ocs/v2.php/cloud/user?format=json"
      },
      "user_response_structure" => {
        "root_path" => ["ocs", "data"],
        "attributes" => { "nickname": "id", "name": "display-name", "email": "email" }
      }
    }
  }
]
Pay special Attention to lines 4 and 12 (highlighted). They need to match. Line 12 will be, what’s on your user interface. Line 4 makes sure that this authentication strategy is allowed to create users.
Also make sure to change the server name in line 17 to match your nextcloud installation.
Adding GitLab to Nextcloud’s OAuth2-Clients
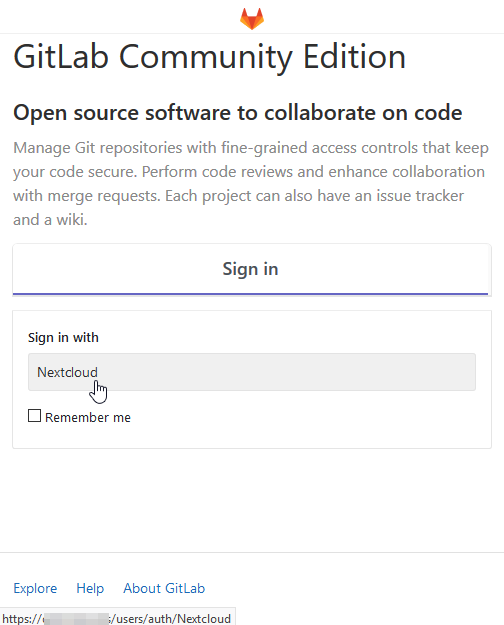
Hovering over the OAuth2-Button (here labelled with “Nextcloud” will give you the URL you need in the next step. Your browser will usually show this at the bottom of the window.
Start your GitLab Instance and go to its login page.
The “Sign in with” (see screenshot) button will tell you, what the right URLs for the configuration in Nextcloud. Simply append /callbackto the URL. If your button links to https://git.example.com/users/auth/Nextcloud, your Redirection URI for Nextcloud will be https://git.example.com/users/auth/Nextcloud/callback.
Go to your nextcloud instance and log in as administrator. Navigate to the OAuth integration settings: Profile Icon (top right) -> Settings. Then choose Security Settings from the Administration part of the list – Don’t confuse this with Personal Security Settings, where you would change your personal password! At the top there’s OAuth 2.0-Clients. (see second screenshot).
Add any recognizable name (GitLab, for example) and the callback URL (see above). Nextcloud will now create a client identifier and a secret for you.
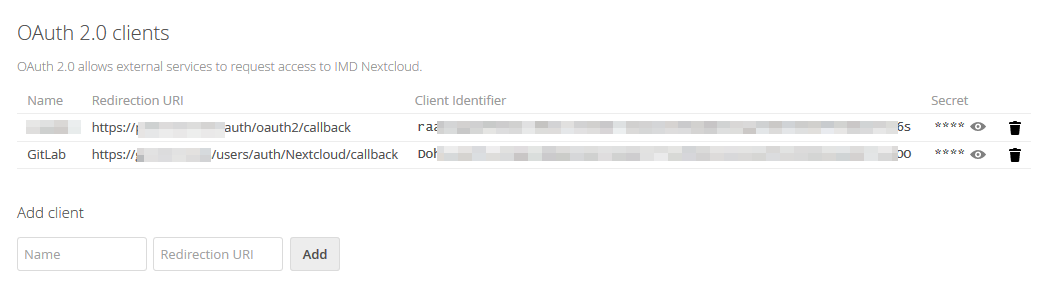
Nextcloud’s OAuth2 client list
Completing the GitLab Configuration
Go back to your gitlab.rb and fill the two details in:
gitlab_rails['omniauth_providers'] = [
  {
    "name" => "oauth2_generic",
    "app_id" => "asdfiuycvzyxcvkh,nwe..... value obtained from nextcloud",
    "app_secret" => "uycvzyxcvkhasdfi..... value obtained from nextcloud",
    # ...
  }
After this change, restart your GitLab server so that the changes take effect.
Linking up the root user, disabling email login
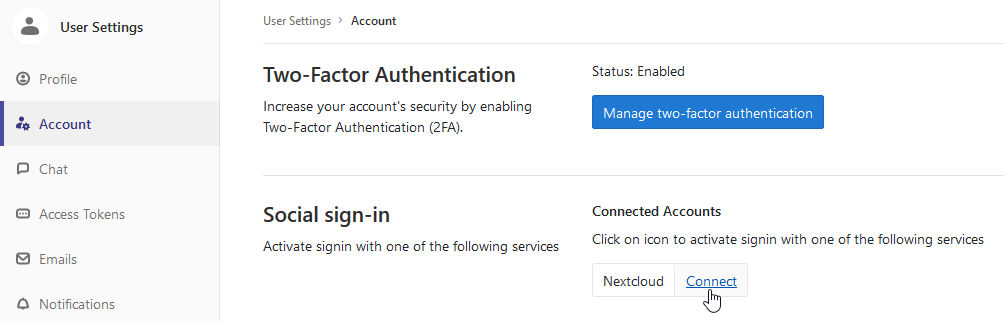
Log in to your GitLab server as a root user. Before disabling email login, you should link your existing user to their OAuth2-counterpart. This can be done in your Profile-Icon -> Settings -> Account. There will be “Social sign-in” with the option to “Connect” it.
After that has been set up, try logging out and in again.
As a last (and optional) step, you can disable regular email login: Navigate to Admin Area -> Settings and open the Sign-Up restrictions and Sign-In restrictions sections. I enabled “Sign-up enabled” and “Send confirmation email on sign-up” and disabled both “Password authentication enabled for web interface” and “Password authentication enabled for Git over SSH”. The last one will requrie your users to work with SSH-Keys, so depending on your user-base you might or might not want to enable that.